Saturday, November 19, 2011

Momma's Awesome Meatloaf!!!

Enjoy it in all it's greatness and splendor!


Okay so here is the recipe!

Ingredients:

1 lbs burger
1 1/2 package crackers
1 large or jumbo egg
1 can cream of chicken soup.


  1. Preheat over to 425
  2. In a mixing bowl with clean hands crush crackers over the burger and start the mash and fold together, adding more crackers as you go.
  3. Crack the egg into the bowl and fold that in as well, it will all start to come together better once the egg is in.
  4. Once it's all mixed togethere evenly, put into pan (any pan will do as long as it's not too big. A bread pan is the best.) and press out to all sides, making sure it's level.
  5. Spread cream of chicken over the top, use the entire can.
  6. Place pan into over and let cook roughly half an hour. Check periodically, to see if its cooked through, sometimes it can be done sooner than expected :)
  7. Once the soup has a skin on his, and possibly even lightly browned, and the meat is no longer pink inside, it's all done!
Super fast and SUPER simple cooking right there for you all! Enjoy it! I know I do. I don't like any other kind of Meatloaf.

BONUS!!: THe best part about this is the it's NOT dry in any way! It's super moist without being ugh, it really doesn't fit any of the preconceived notions of meatloaf!

ENJOY!

Saturday, November 12, 2011

Special V-Log #2 Spaghetti with Garlic Toast

Hey all, our second V-log is ready to go! Tonight I made Spaghetti with Garlic Toast! Enjoy the video. If you want the full written recipe check it out here... Spaghetti with Garlic Toast :)

Without further ado, here's the V-log!


As you can see we now have a twitter account. I will connect it up with the blog tomorrow, I'm so sleepy tonight. As it is I really really hope you all enjoy this! Its so good and really easy, I want everyone to have a go at it! Have a great evening everyone, I love you all!

Saturday, November 5, 2011

Simple Cooking V-Log One! Baked Ziti and Ceasar Salad!!

Alright everyone, this is it! This is what Jay and I have wanted for Simple Cooking all along. Our ultimate goal has always been to turn Simple Cooking from a a text blog into a V-log. I know it's not the best quality, but this is our very first one and we're SO excited about it! I hope you all enjoy it as much as we enjoyed making it, and eating the final results...Jay had some for breakfast this morning as well hahaha!

Also along with posting the V-log here, we ask that you all check out our brand new Simple Cooking Channel on You Tube. So here it is, what everyone's been waiting for! The Simple Cooking V-Log!


I hope you all enjoyed it! Here are the written instructions as promised!

Three Cheese Baked Ziti

Ingredients:
  • 1 box ziti noodles
  • 2 jars of tomato and basil spaghetti sauce
  • shredded mozzarella cheese
  • shredded/ground Parmesan cheese
  • sliced provolone cheese
  • sour cream

Alright so before we really dig in, you want to set a pot of water to boil, make sure it is big enough to cook the entire box of noodles. After that, things move super fast and you really have only about 10 minuets of wait time.Preheat over to 350 degrees Add box of noodles to the boiling pot of water, and cook for about 7-10 minuets until the noodles are al dente (see glossary term at the end of the recipe) Once the noodles are cooked, pour them into a strainer and rinse with cold water until they're luke warm.

Next, get out a baking pan, one you might use for other kinds of casserole, or cakes, etc. and cover the bottom with the cooled noodles.

Add on a layer of sauce, covering the noodles. Place the provolone cheese around the pan on top of the noodles and sauce. Next add on a nice thick layer of sour cream. (Helpful Hint: I like to spread the sour cream on each slice of provolone before putting it into the pan. I learned the hard way what it's like to spread sour cream onto something that is slippery underneath! )
Add another layer of noodles, and another layer of sauce.

The next layer is a nice, thick spread of mozzarella cheese, don't be afraid to cover it all!
Layer on the last of the noodles, and the rest of the sauce once more time. Finally cover the top with the Parmesan, as much or as little as you like, it doesn't matter a whole lot, do it to taste!
When you're all done, put it in the over for 10 minuets, just util it starts to boil at the top a little and the cheese melts. Remove from the oven and serve it up!


Cesar Salad

Ingredients:

  • Lettuce
  • Parmesan cheese
  • Croutons
  • Cesar dressing
Break lettuce up wash it up if you choose, fold in Parmesan cheese and croutons, then mix in just enough dressing to coat everything without drowning it all.

There ya go, that's all you need! I hope you all try it and really enjoy it! :)

Sunday, October 2, 2011

Cassie's AWESOMESAUCE Feista Chicken Enchiladas

This one is the FIRST!!! recipe that has come to me through our Simple Cooking Group . One of my best friends, Cassie posted this. Now growing up I never liked the way my parents made enchiladas, but when I read Cassie's recipe I just had to give it a try since it was so different from what I am used to. It was so amazing! Its just... all I can say is you can't understand till you try it for yourself! So with a large THANK YOU to Cassie, we dive right in!

Ingredients:


1 small onion, chopped ( or how ever fine you wants it )
1 clove garlic, minced
1 lb chicken breast chopped ( i use 2 breasts from a bag of frozen breasts. we have done strips, corsely and finely chopped. it all depends on the size ou want to bite into )
1 cup salsa, divided  ( THIS  is your real deciding factor of how spicy and the base of the flavor. I probably use about 2 or 3 cups in total. )
4 oz cream cheese ( if you cut it up it melt quicker and spreads nicely )
1 Tablespoon chopped cilantro
1 teaspoon ground cumin
1 cup shredded cheese  (what ever you like. i usually use coby jack cheese and probably use about 2 cups.... )
8 tortillas

Alright so this is the list as Cassie posted it. I highlighted the first two in red as I did not use them, since I had plenty of onion and garlic in my salsa. FOR the salsa, I used the fresh from scratch stuff I made in my previous entry. 

Alright so lets start cooking!

  1. Preheat the over to 350 degrees
  2. In a larger sauce pan heat it up on low with either oil or butter, however you prefer it. Chop up your chicken and toss it in.
  3. As the meat starts to slowly cook, add in your onion and garlic. (Like I said I didn't do this due to my salsa.) saute it a bit.
  4. Add in a cup of the salsa.
  5. If you ought your cream cheese in bar form, it's only half a bar that you need. I cut that up into 8ths so it would melt faster and spread it around the entire pan. 
  6. When its about half melted, add in the cilantro, (see previous entry on how to cut up easily) and the cumin. I actually added a ton of the cumin, as I just really really love the flavor. It wasn't too strong just right, mmm yummie!
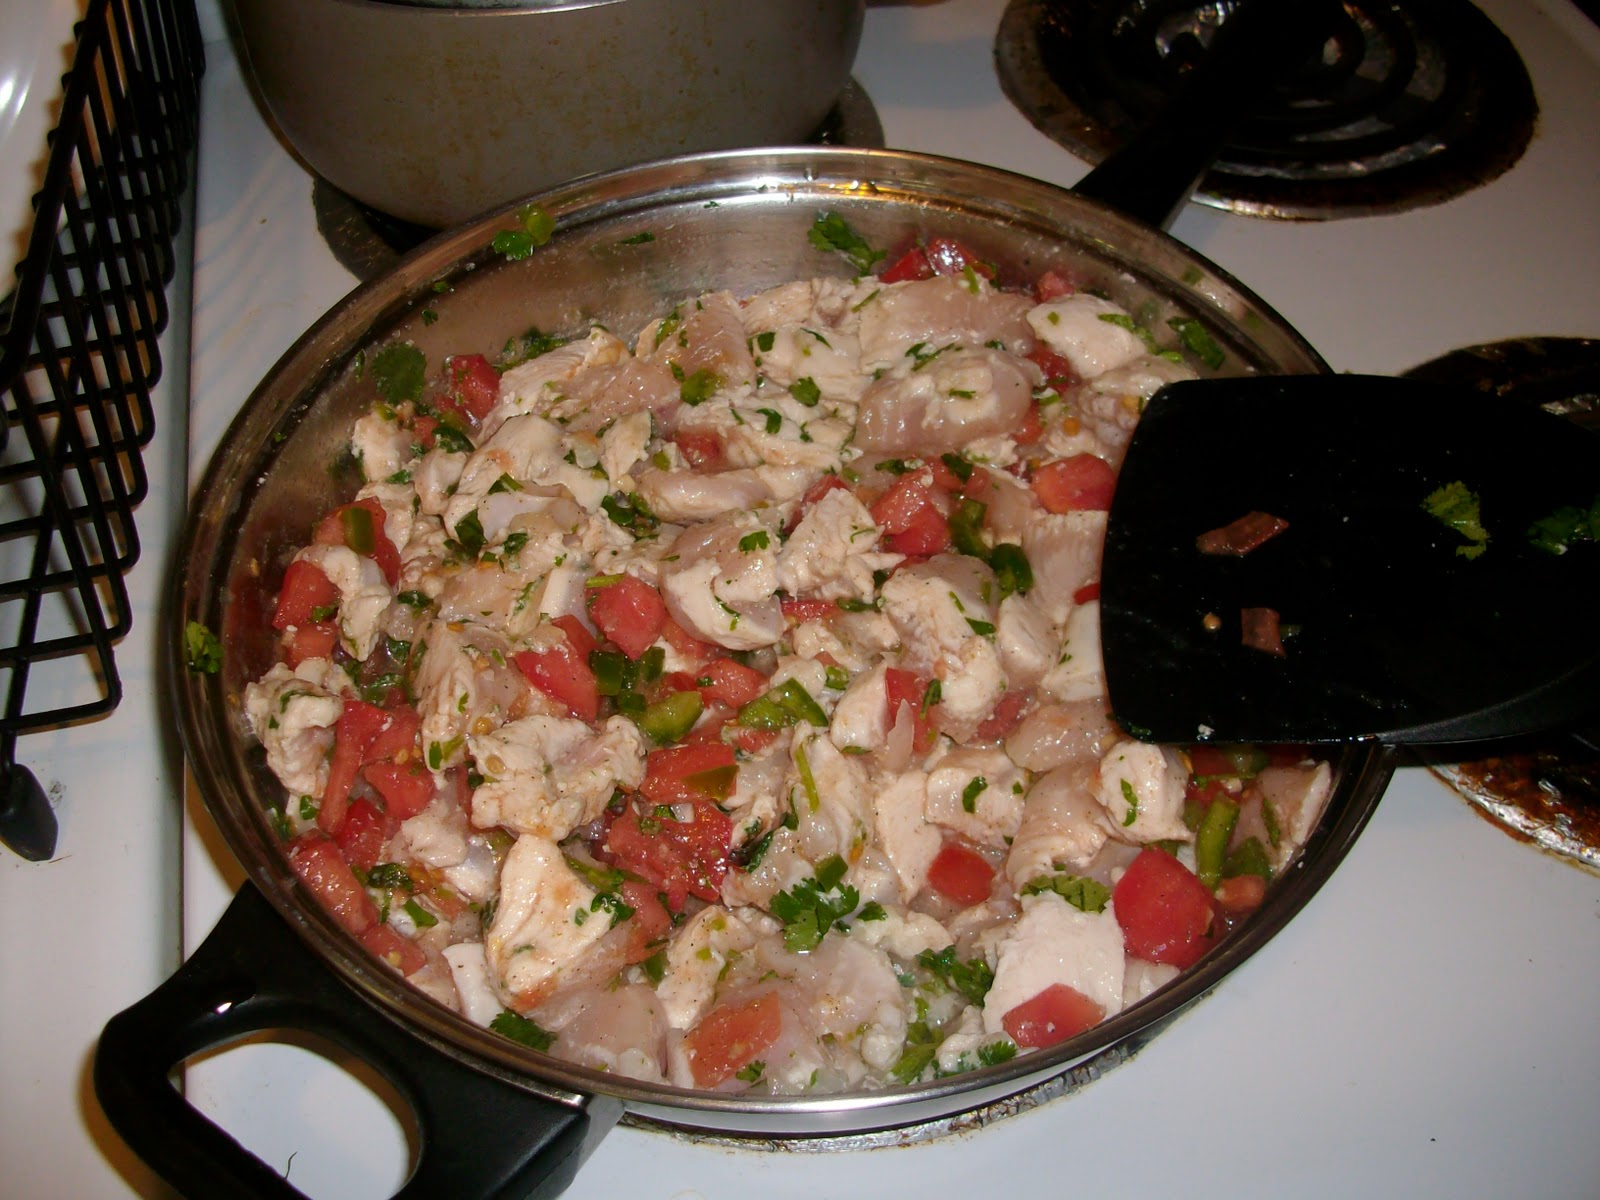
  7. As it all melts down and starts to come together, you'll find it becoming very sauce like all on it's own accord. this is good, we want that. just be sure you're checking your chicken to know it's cooking through all the way. Once the chicken is done, add in your shredded cheese to goo-a-fy!


Alright so now that we're all cooked up, its time for the baking pan. A larger casserole dish is best but I didn't have one so I had to make due.

If you have more salsa, lay it out on the bottom of the dish.


Next, lay out a tortilla. and scoop some of the dish onto it. You can do this one of two ways. You can double the tortilla shells and put the sauce in there with the rest of it. Or you can use one shell and strain the sauce back into the pan. If you use only one tortilla and the sauce it will rip through and it really isn't fun to deal with that. I learned it the hard way. That's when I started to strain out the chicken and sauce.


Wrap it up burrito style or however you like, and lay it seam down in the baking dish. Rinse and repeat, you know how it is, till you baking dish is all filled up.


Alright, so now you should have a lot of leftover sauce with some chicken. Get a spoon or measuring cup or something and drizzle it all over the top of the shells, covering them completely. There may or may not be chicken int he sauce, that's just fine. The more chicken the merrier! After that, if you have any more cheese, just lay it out on top. You can never....NEVER have too much cheese!


Now we bake! Put it in the now hot oven for about 15-20 min. Any longer and the edges of our tortillas will may burn. Mine were only in for 15 and it smelled like they'd burned. Luckily they didn't. Once it's all melty and hot you can take it out of the oven.


Now I actually had to use two spatulas to get these out, they were THAT full, and they still broke up on me! HAHAH! Once you have the enchilada onto the plate, use what's left of the salsa to top it off.


There is SO much food there it's insane! But OH! So mouth watering delicious! I water just thinking about it, this is my new favorite meal, I kid you not.

That's all there is for this super easy!

Who will like this: Adults, especially if you like Mexican food. Children might if you make a smaller one for them, and also if they aren't picky about "foreign objects" I.E.: the weird red or green things. Also depending on the spice level of the salsa that you use, people may not enjoy it if they aren't big on spicy foods. My version in pretty mild, as I didn't make a very spicy salsa for it at all.

LEFTOVERS!!!! We had tons of left overs. They were really good fresh and cold form the fridge the next morning for breakfast. May sound odd but everything you should have for your first meal is right there wrapped up in a nice shell. It's hard from cold and since you wrap the end up, nothing falls out and you can eat on the go if you need to!

That's all for Simple Cooking tonight, you got two entries for the price of one! Enjoy the Enchiladas and let me and Cassie know exactly what you think of them over at the Simple Cooking Group or right here in the comments for Simple Cooking.

Until next time. I love you all, and remember to love yourselves too!

~Alex~

Home Made Salsa!!!

ALRIGHT!!! I have a super quick super easy recipe for salsa, only takes a few minuets to make too!!!

Ingredients:


  • Two large, firm tomatoes
  • Peppers..green pepper, jalapeno pepper it doesn't matter here just whatever you prefer. PLEASE READ THE NOTE AT THE END OF THE RECIPE BEFORE YOU MAKE THIS!
  • White onion
  • Cilantro
  • Lime juice
  • Minced Garlic (for salsa I like to use the pre-minced stuff in the jar, it's comes in a liquid so the pieces are nice and soft and you're not biting into hard garlic)
Note: If you need pictures for this one..there is no hope for you.

Alright so this so freaking easy anyone can make it. you CANNOT SCREW THIS UP! I promise you that! So lets roll up our sleeves and get started!

  1. Chop up your tomatoes. I use really first ones because I have such a hard time dicing them up what they're soft. Put ALL of it into a good sized bowl. The juice, seeds, everything.
  2. Dice up your onion. The amount you use is dependable on how you like it. I'm not a big fan of it, but Jay is. I can't bite into hard onion it makes me gag so I used the cheese grater to made it mushy and put a lot in that way. This way I can bite into it without worry and Jay gets lots of onion!
  3. Cut up your cilantro. This you need VERY little of. Also scissors is the easiest way to get nice small bits, just hold it all together in one hand, making it as dense as possible. Then use the scissors and snip snip snip snip and it'll just mince itself!
  4. Now for the pepper. I do this last because I know how bad it is to get pepper in your eyes or on your face. Depending on how spicy you want it, you can add in the core, or at least the seeds. If you don't want to use them just cut them out and set them aside. Dice up your pepper and add it into the bowl with everything else.
  5. Using a long spoon or spatula, fold the ingredients together. Switch between a gentle fold and a slow mixing stirring. The juice from the tomatoes will be more than enough for the liquid aspect, the rest is nice and solid and crunchy and spicy for you!
  6. Add in one teaspoon of the minced garlic and mix.
  7. Add in the lime juice to taste. Start with a little and go from there. I don't like Lime at all, but I found the salsa didn't taste right to me until I'd used like half of the little green lime thingy haha!
From there adjust the amount of lime juice and garlic to your liking..the lime can do A LOT for the salsa and is great for balancing out a flavor you don't want as strong. Also black pepper helps to balance out come flavor too!

IMPORTANT NOTE!: If you have never word with peppers of any kind before PLEASE BE CAREFUL! The core with the seed are ALWAYS the hottest parts. Once you make the first cut into your pepper do not, DO NOT touch any part of your face! If you cut up the pepper before you dice up other ingredients, PLEASE wash the knife and the cutting board before moving on. Also PLEASE wash your hands right away. I am speaking form experience when I say you do NOT want any part of a pepper even if its only a green pepper, on or near your face. Please be careful!

That's really all there is to this. It's really good. I kept a bag of tortilla chips next to me for proper taste testing!

I don't really have any special tips on who'll like this or anything like that. It's salsa, if you don't normally like salsa this may be a good way to to try different things to see if you just have a particular taste to it, or something like that, yanno? Give it a try, it can't hurt. I just used a green pepper, not super spicy but enough and it was SO good...and that's coming from someone who's very picky about salsa. 

That's about it for now. I'll have another recipe up VERY shortly. Keep this one in mind, when you read the next one. Until then, have a good one!

Saturday, September 3, 2011

Spaghetti and Garlic Toast

Alright it's that time again, for another super simple recipe! Today it is my all time favorite food, something I've been in love with for as long as I can remember and for me at least, there is nothing better.....Spaghetti!!! And also a really great, super fast way to do some home made garlic toast! :)  Really it's the sauce we're making from scratch here. If you need detailed instructions on how to boil noodles I worry for you, haha! but go a head and read this there is a brief description on cooking noodles, most all are the same as far as it goes so have at I'd say :) .  I actually got this sauce recipe from my Momma, back when I was in Jr. High school. I've tweeked and altered it over the years to suit my tastes and those of others, etc. So lets get cooking!!!

Ingredients:


  1. 1 Box of spaghetti noodles
  2. 1 pound of hamburger (optional)
  3. Two 29oz cans of tomato sauce and One 15oz can
  4. Oregano, Basil, Thyme, and Rosemary
  5. Soy sauce (don't knock it till you try it)
  6. Garlic (two cloves or already minced)
  7. 1 green pepper, or red pepper flakes

So to kick things off go a head and start boiling the water for the noodles. This is literally the longest process so start it first, or possibly even several minuets before you start anything else, depending on your time allowance. Bust out a second large sauce pan where you'll cook p the burger and make the sauce. Got it? Okay ready now? Lets get started!

  • Cook up the one pound of burger in the pan, getting it chopped up nice and fine till almost all of it is nice and brown. (if you prefer meatless skip this step :) )


  • Open up all three cans of sauce and add them to the pot with the burger. Mix it all gently together, making sure all of the meat is mixed in well.

  • Next you want to crush up two cloves of fresh garlic, OR use about the same amount from a jar of pre-minced garlic. Add it into the center of the pot and stir in well. It will separate on it's own and flavor all areas of the sauce.

  • I like a lot of oregano in my sauce, it really is my go to herd here. Sprinkle on the oregano liberally, covering the top of the sauce really well. 

  • BEFORE stirring the oregano in, sprinkle on the basil. I suggest using about 1/3 the amount of basil you use of oregano. If you take a look at the image above and the image below, you'll see what I mean about the proportions.

  • Now you can slowly stir in the oregano and basil, it's kinda fun to watch it slowly vanish into the sauce, and you'll really start to smell the yummie goodness too!
  • After it's all blended in, it is time to add in the rosemary. You don't nee a lot of this pine needle looking herb. Just a small enough pinch to fill the hollow in the palm of your hand (see image below). Once you have it in your hand use your fingertips to crunch it all up, essentially you'll be breaking each needle into two or three pieces, but that's all you need.

  • Stir it all in, and then lightly dust the sauce with thyme. It'll smell a bit like Christmas, but it won't last for long.

  • Once everything has been blended together, you add the soy sauce. You only need one maybe two small splashes of the soy sauce. Any more than that and you're risking the sauce tasting really salty. If that happened, use the oregano and more garlic to balance it out.


  • Blend in the soy sauce really well, I suggest stirring for at least a 30 seconds to make sure it really is spread out evenly.
  • By this time your water should be oiling and you should have added your spaghetti noodles to it to cook.
  • Back to the sauce, this is where we throw in our pepper. Normally I would cut up a fresh bell green pepper, tossing out the seed and insides, and slicing it up to about half inch sections. Freeze the rest for later use in another sauce and toss in two or three pepper slices. They don't make it hot, but add just the right amount of zip to it.
  • If you are unable to use green pepper for whatever reason, red pepper flakes (the kind I use in the Orange Chicken) are a great substitute, just sprinkle in a small spoon full and lightly dust the sauce with some black pepper (see image below) The combination has the exact same effect as the fresh/frozen green bell peppers do.

  • Once it's all been mixed in, give it a small taste (remember it's hot!) If it is there is too much garlic, or too much salt, or whatever, play around with the herbs to balance it out to how you like it. The great thing about the sauce is it's ability to be customized! Make it your own!
  • When you have everything to taste, go a head and let it simmer on low until the noodles are finished. It shouldn't be too long now.
While We Wait...

Let's go a head and make some quick garlic toast. All you need is bread, a toaster, butter or margin, and garlic salt (not garlic powder! For the love of all that is holy please listen to me and do not use garlic powder you will regret it! HAHAHA)

  • Put the bread in the toaster and prep the ingredients.


  • When the toast pops up, and while still hot, spread out the butter/margin
  • Next very lightly coat the buttered toast in garlic salt. You don't need a lot.


That's it, you're finished. By this time your noodles should bet completely cooked, and ready to serve, grab a plate, dish up, add your garlic toast and some Parmesan to top it off and dinner is served!


LEFTOVERS!!!!! One of my favorite things to eat (after a fresh hot spaghetti meal) is cold leftover spaghetti  smothered in an offensively large amount of Parmesan cheese. I don't know why but its SO good. And heated up, this sauce tasted drastically different after being in the fridge over night. It's like a totally different meal. And unless you're feeding a lot of people, you'll at the very least have left over sauce, considering how much tomato sauce went into it!

Who will like this:

  • Everyone! I honestly do not know anybody who doesn't like spaghetti. I won't say everyone loves it, but I've never had someone turn it down before if you know what I mean. It's a great classic, and fun to eat. Perfect for large dinner parties since it's just so damn easy to make more! So serve it up anytime to anyone and ENJOY!!!
That's all I have for you for tonight my loves! Enjoy the meal and keep you're eyes open for some short "bonus" recipes directly from the lovely members of the Simple Cooking Facebook group! Please come join us, check us out and share your own recipes! Thanks for reading!

~Alex~

Thursday, August 18, 2011

Three Cheese Baked Ziti

Hello my loves! I know it's been a while since I updated you with so super yummie food, but I promise the wait is well worth it. Today I am giving you Baked Ziti! It's something I've been making for a really long time. This particular version has three different kinds of cheese in it, and is so ooey gooey good I've had friends ask me if I'd make it for them if they bought all the ingredients. So are we ready to rock? Then lets wash our hands and get cookin' !

Ingredients:


  1. A box of Ziti noodles (my local stores don't carry it, Mostaccioli works just as well!)
  2. 2 jars of your favorite red sauce (I like to use tomato and basil)
  3. A package of shredded mozzarella cheese
  4. A package of sliced provolone sandwich cheese
  5. Parmesan cheese. (You can use shredded but the powdered kind is just fine too!)
  6. 16 oz sour cream

Alright so before we really dig in, you want to set a pot of water to boil, make sure it is big enough to cook the entire box of noodles. After that, things move super fast and you really have only about 10 minuets of wait time.
  • Preheat over to 350 degrees
  • Add box of noodles to the boiling pot of water, and cook for about 7-10 minuets until the noodles are al dente (see glossary term at the end of the recipe)  

  • Once the noodles are cooked, pour them into a strainer and rinse with cold water until they're luke warm.

  •  Next, get out a baking pan, one you might use for other kinds of casserole, or cakes, etc. and cover the bottom with the cooled noodles.

  • Add on a layer of sauce, covering the noodles.
  • Place the provolone cheese around the pan on top of the noodles and sauce.
  • Next add on a nice thick layer of sour cream. (Helpful Hint: I like to spread the sour cream on each slice of provolone before putting it into the pan. I learned the hard way what it's like to spread sour cream onto something that is slippery underneath! )

  • Add another layer of noodles, and another layer of sauce.

  • The next layer is a nice, thick spread of mozzarella cheese, don't be afraid to cover it all!

  • Layer on the last of the noodles, and the rest of the sauce once more time.
  • Finally cover the top with the Parmesan, as much or as little as you like, it doesn't matter a whole lot, do it to taste! 


When you're all done, put it in the over for 10 minuets, just util it starts to boil at the top a little and the cheese melts. Remove from the oven and serve it up! 


As you can see, it DOES NOT come out in a nice layer like a lasagna would, but that's alright, everything still mixes really well together and is still FABULOUS to taste!

LEFTOVERS!!!!: Not only can one box of noodles in this dish feed a few people but there is enough to feed a TON of people! Even when I feed close to seven people on one box (three of which have massive appetites) I still have left overs! This lasts us for a good long while, its wonderful to bring to work or school and its so good cold or hot!

Who will like this:
  • People who do not like sour cream!!!: I have a very good friend who loves this meal. I fed this to him several times before I discovered he didn't like sour cream. I asked if he knew I had it in the Baked Ziti and he was floored, he said he couldn't taste it at all. Even now, knowing its in there, he still loves it!
  • Children: It's cheesy, ooey, gooey and strings out like mozzarella, so it's really fun. The noodles are small too so that helps kids approach this new dinner idea more easily.

GLOSSARY TERM!!!!! 

For those of you who don't know what "al dente" means. Here is the definition directly from BusyCooks.about.com

Al dente refers to the desired texture of cooked pasta in Italian cooking. It literally means "to the tooth". When the pasta is cooked al dente, there should be a slight resistance in the center when the pasta is chewed.

That is it for tonight, my loves! Cook, and cook for the love of it! Feel free to ask any questions you might have right here OR... on the Simple Cooking Facebook group page! Come join the fun and the conversation! See you all later!

~Alex~